Synopsis
Anyone can create a great technical website (that looks like this one) using program R, RStudio, the distill package, and GitHub pages. Furthermore, by using GitHub as our code repository we can ensure that our code is safe and reproducible. Thanks to GitHub, we can roll back changes if we ever damage our code. All of these tools: GitHub, RStudio, R and the distill package are free.
In the sections below I show how you can create a distill website with nothing more than a basic working knowledge of GitHub, RStudio, and R Markdown formatting. There are various alternate ways of creating a distill website but this is the version that works well for me. Indeed, this website was created from the code and the steps given below.
Getting started
In order to get started you will need to be registered on GitHub and have RStudio and R installed on our computer. The distill package will also need to be installed (see https://rstudio.github.io/distill/website.html). For the purposes of this example I will assume you have some working knowledge of R and RStudio. The main code for the layout of the website will be written in R Markdown. If you are unfamiliar with R Markdown a good introduction can be found here https://rmarkdown.rstudio.com/.)
Create repository
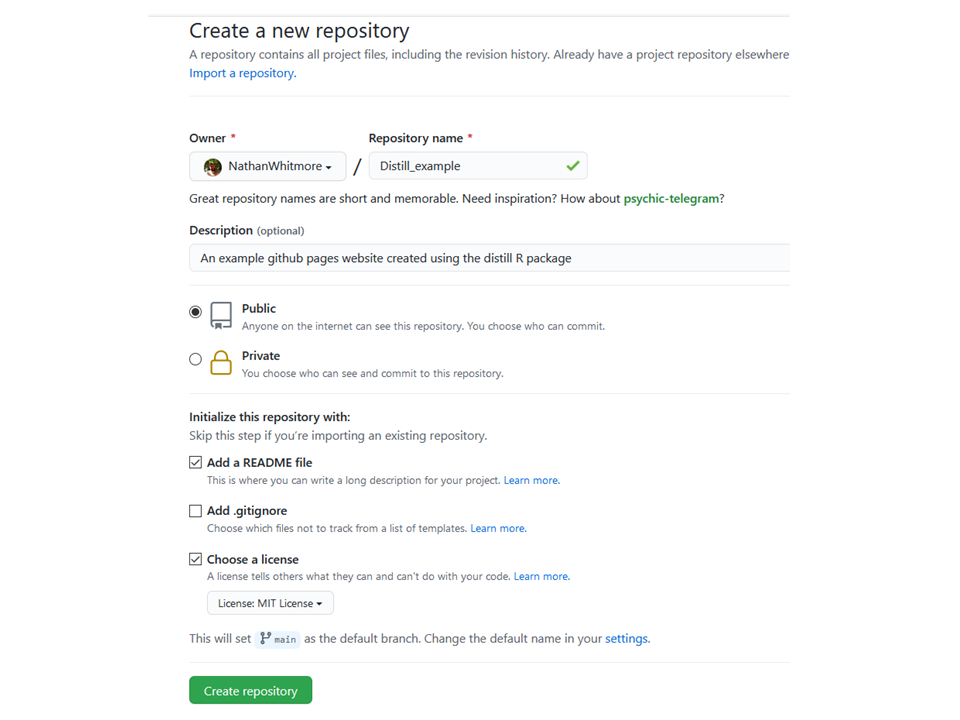
We begin by creating a new GitHub repository, giving the project a description, a readme file, and a license. This basically creates a place on the internet for our files.
Copy URL
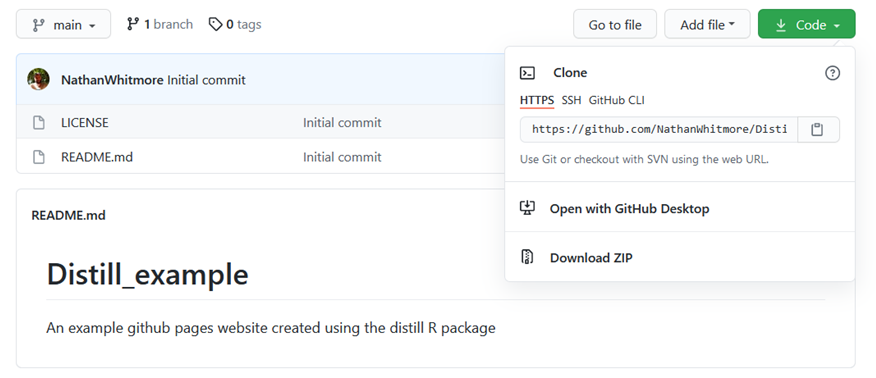
The next step is to go to the green radio button and copy the URL. We will need pass this information to RStudio so it knows where to put the files when it exports to GitHub (a process known as a push).
Install distill package
Now install the distill package in RStudio either via the Packages pane in RStudio or via the following code:
install.packages("distill")
New project via Version Control
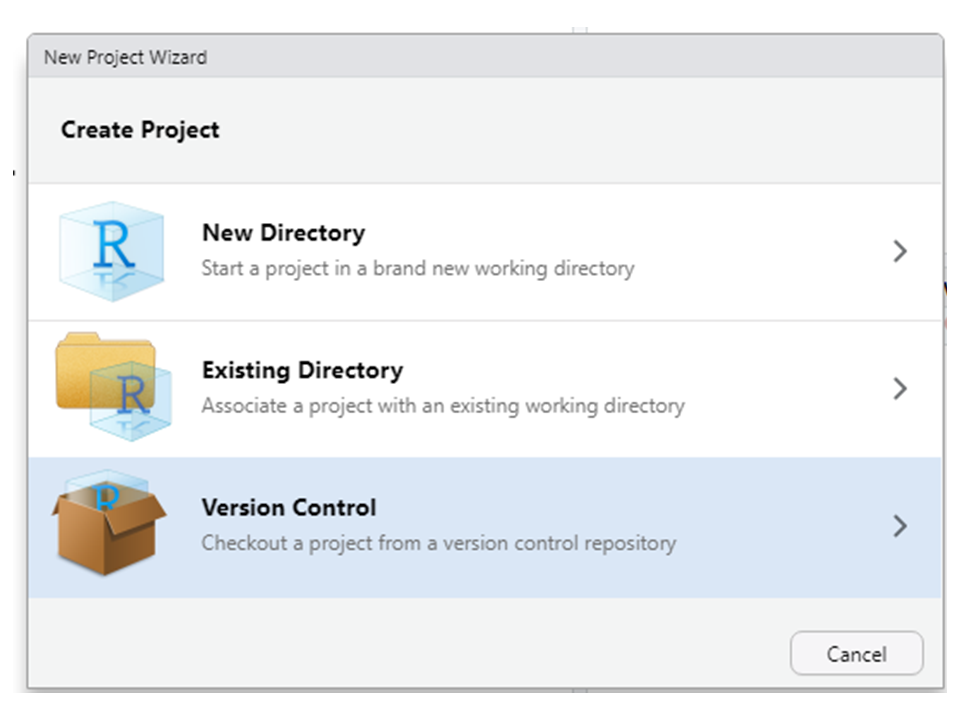
Next we create a new project in RStudio using the Version Control option. This allows us to link our GitHub URL to our RStudio project.
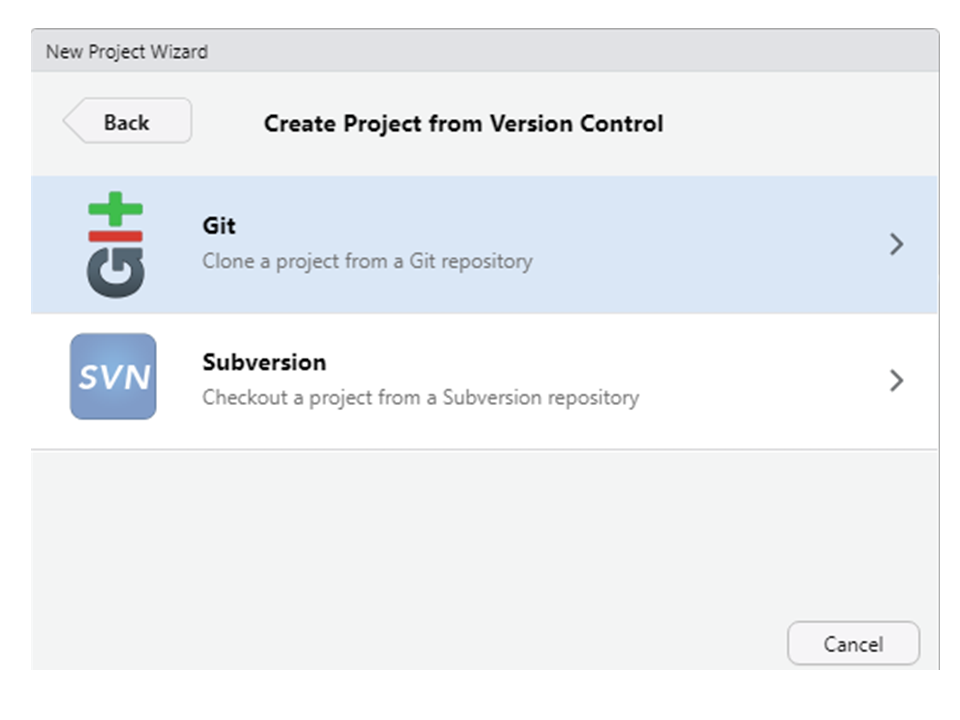
Choose Git
Paste URL
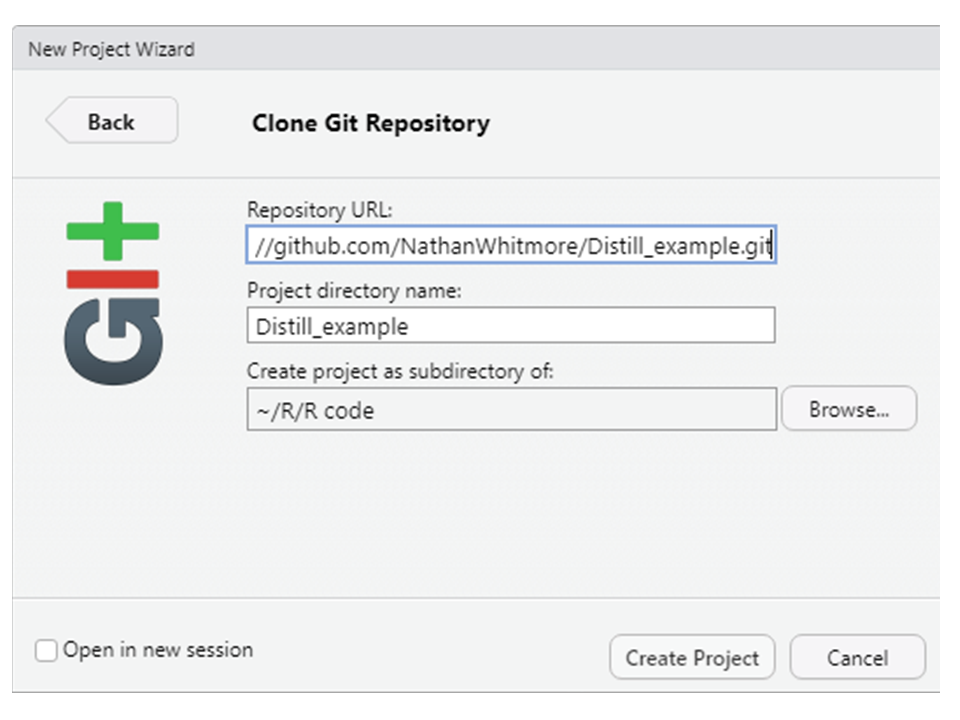
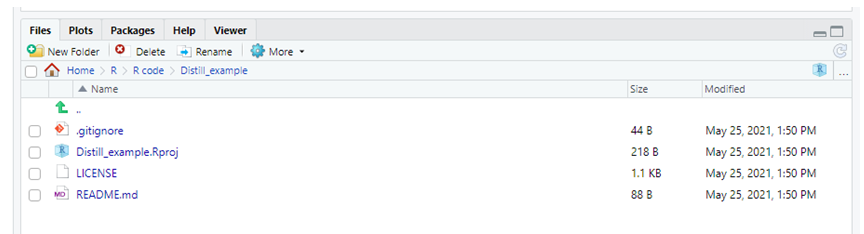
RStudio now pulls the pre-existing files from your GitHub URL into your project folder. You will see the files appear in your environment pane.
Render website
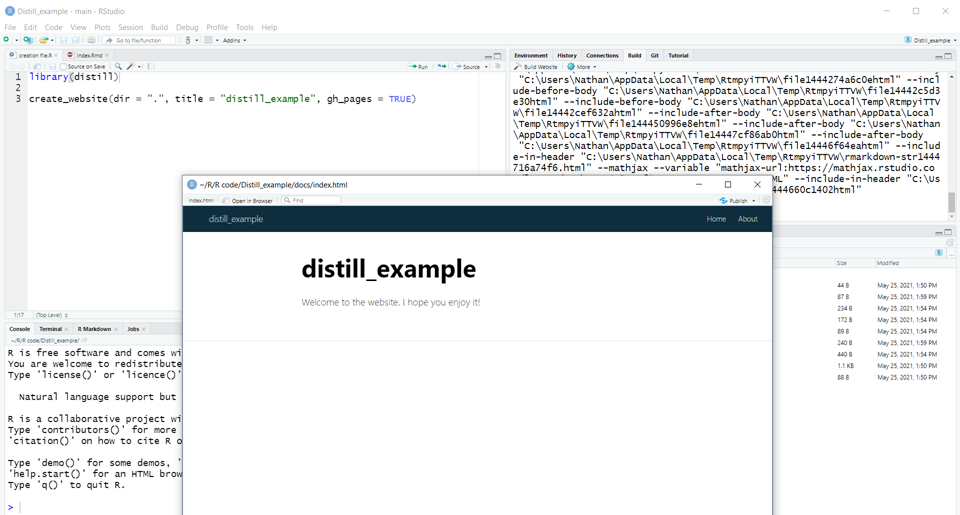
Next we run the following code to create a website that can be displayed in RStudio (and later pushed to GitHub).
library(distill)

create_website(dir = ".", title = "distill_example", gh_pages = TRUE)
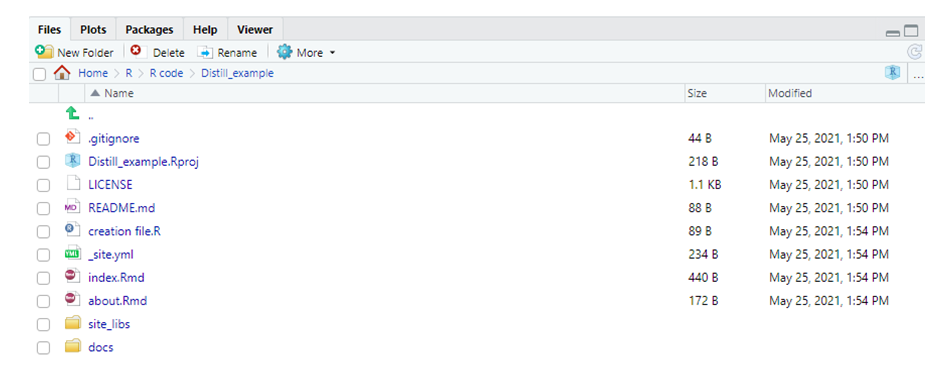
This will then create the files required for a simple website including a home and about tab.
You will then be presented with your index.Rmd (R Markdown) file which forms your website’s home page. The top portion of your R Markdown file, bounded by a line of dashes (---), contains the YAML script which defines the look of a particular page. This can be altered to customise some aspects of the page’s layout.

Close the project
Next close the project and reopen it.
Build the website
A build tab (should now appear in the top right hand corner pane. Click on it. Click on it and your website be rendered by RStudio. If you open the build tab you will be presented with a hammer icon labeled Build Website. When you click on the icon on it your files will be formatted for website deployment and the website will be rendered in an RStudio window. If you fully open the window you will see an option in the top left hand side to Open the Website in your browser – this will give you a good indication of its final look.
Commit changes to GitHub
Now when we click on the Git tab up on the right hand side, we will see there a list is compiled of the the file changes we have made since we first pulled from GitHub. What we want to do is commit these changes to GitHub, which means that these changes will be implemented when we next push the changes to out repository. To do this we tick all the files we want updated (which is all of them) and then press the commit button.
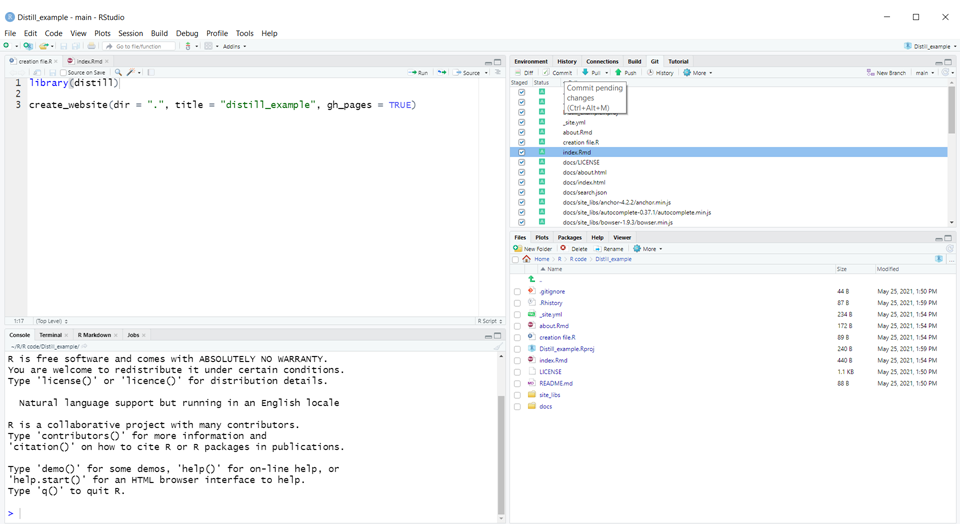
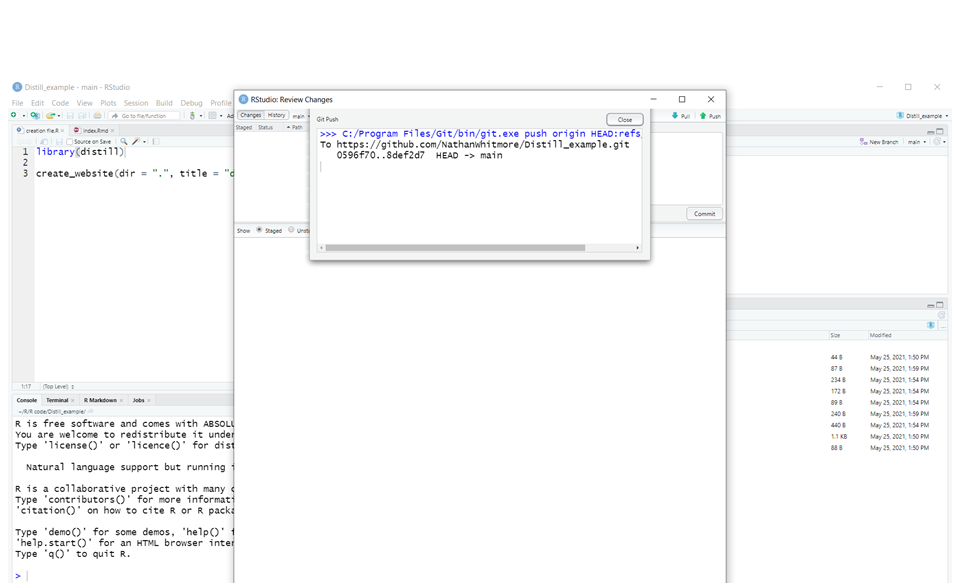
We will then be asked to add a comment (which will help us track the changes we make). Now, it is important to know that nothing will update on the GitHub site until we press the push button. Once we press the push button we will see something like:
Return to your GitHub repository
Now we return to our GitHub repository and check to see whether these changes have been made. This can take a couple of minutes.

Go to GitHub settings
Set source files
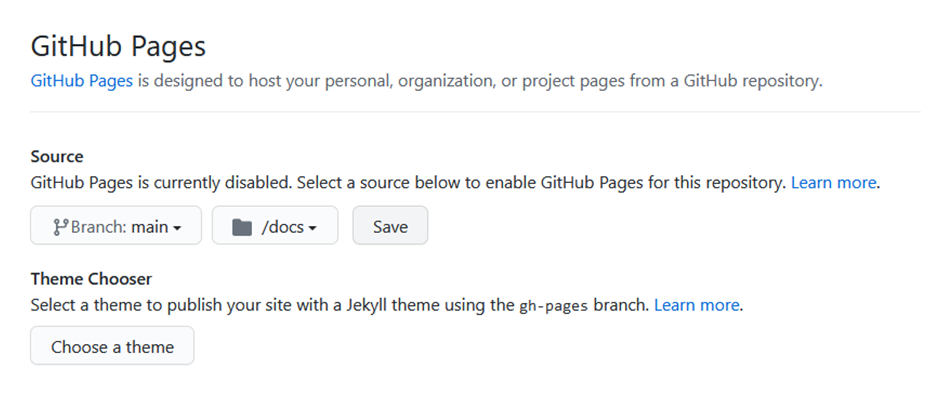
The next step is to go your repository’s GitHub settings and scroll down to GitHub pages (this may send you to a new page). There you will need to tell GitHub where your source files are located. Because of the way we have created the website these will be located on your main branch in your docs folder. Make this selection and then save.
Copy the public URL
Now that you have done that you will see highlighted text appears saying “Your site is ready to be published at…”.
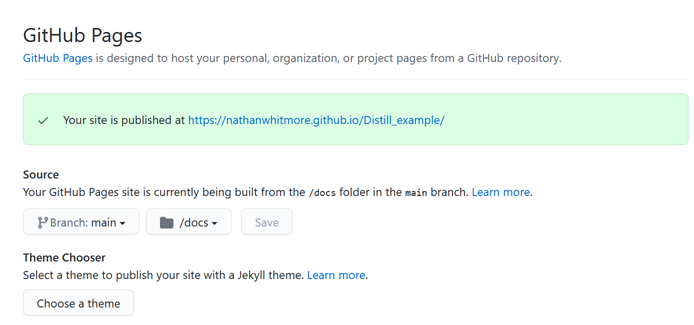
Copy the URL to your browser and hit enter.
Admire your website
Be patient – it may take 10-15 minutes for your website to appear. Take time out to enjoy this little success. What you see should look something like:
Next steps
You are now in a position to add more content to your website by amending your existing R Markdown pages (index.Rmd, which is your home page, or about.Rmd) or adding new ones. A great place to start on this journey is https://rstudio.github.io/distill/.
Acknowledgments
This website would not be possible with out the tools made by RStudio especially the distill package (Allaire et al. 2018).
Code
The final code used to render this page is available at https://github.com/NathanWhitmore/Distill_example
Allaire, JJ, Rich Iannone, Alison Presmanes Hill, and Yihui Xie. 2018. “Distill for R Markdown.” https://rstudio.github.io/distill.